If you’re looking to spruce up your living space, a great way to do that is by hanging wallpaper. You can get an awesome new design that adds vivacity and a newness to any space without having to worry about painting any intricate designs yourself.
But, if you’ve never done it before, hanging wallpaper might seem like a daunting task. And you might have a few questions like “is it hard to put wallpaper up,” or “where do I even start when putting up wallpaper?”
Not to worry! We’ve got the steps to take, plus tips and tricks to help you hang wallpaper like a pro.
First time hanging wallpaper? Follow our tips!
If it’s your very first time hanging wallpaper, here are just a few tips to get you started.
- Be patient. The first time you do it can be tedious, and it can take a while. And you might run into some issues along the way. Go into the process with patience, and you’ll feel much more relaxed during the process.
- Size your wall first. We’ll tell you exactly how to do that so you can make sure you get the right amount of paper. But definitely size the wall first before you purchase anything.
- Get a wallpaper with no selvedge edge. The selvedge edge is an unprinted piece on either edge of the wallpaper which needs to be trimmed off so that the seams can be pieced together correctly. But trimming the selvedge edge is a pain in the rear, so if you can, go with a pre-trimmed wallpaper.
- Order extra wallpaper to allow yourself plenty of mistakes! And when you cut your wallpaper, give yourself extra room on the height, too. Believe it or not, your walls and ceilings aren’t gonna be totally straight. Nah, they’re probably really crooked. Give yourself that extra height so you can cut it along the edge of the trim.
How to hang wallpaper
Now that you’ve gone over tips for your first time hanging wallpaper, let’s get down to how you actually do it.
What you’ll need to hang wallpaper:
Most things needed to hang wallpaper you’ll probably already have in any DIY kit. Here’s exactly what you’ll need:
- Angled paint brush
- Eight inch plastic smoother
- Glue syringe
- Level
- Natural sponge
- Nine-inch paint roller
- Painting tray
- Patience (did we mention this already? Well, it begs being repeated.)
- Pencil
- Scissors
- Seam roller
- Single edge blade
- Straightedge
- Tape measure
- Ten inch scraper
- Terry cloth rags
- Three inch scraper
- Utility knife
- Wallpaper (Ok, this one’s a bit obvious!)
How much paper will you need?
A standard roll of wallpaper is 10m x 53cm. Measure the width of the room and divide that number by 53cm. This will give you the number of drops you need.
Then, measure the height of the room (minus any skirting boards and cornicing, but add 15cm to account for any trimming). Multiply the height by the number of drops you need, and that’ll give you the total number of metres you need.
Be sure to give yourself some wiggle room by buying extra to allow for any mistakes.
Prep your walls
Before you do anything else, you need to prep your walls. Just like for regular paint, you’ll need to spackle and sand your walls to get a smooth surface that’s ready for your wallpaper.
It sounds like such a pain, but any imperfections on your walls will be noticeable after you hang wallpaper if you don’t prep the walls first.
Once you’ve spackled and sanded, apply a coat of primer that’s made for wallpaper and allow it to cure.
Where do you start when hanging wallpaper?
When you’re getting started, it’s gonna feel obvious to start right in the middle of a wall.
But when you do that, matching up patterns from the start of your wallpaper to the end of your wallpaper will be difficult, and when you have guests over, their eyes are going to naturally be attracted to that one part of your wall. Not ideal!
Start in an inconspicuous corner and work around the room instead.
Wallpaper gluing and booking
Cut your wallpaper to size and leave about 10cm of overhang on each end. Working in smaller strips is easier for hanging wallpaper.
Use a “clear hang” glue or ask your wallpaper dealer what the best adhesive for your particular wallpaper is.
Pour your glue into a painting tray, and roll your paint roller through it, sloughing off the excess. Paint rollers apply the glue quickly and more evenly than using a paintbrush. But you can definitely use a paint brush along the edges to make sure you get those coated.
Lay your wallpaper pattern side down on a flat, even work table or work surface. Apply the glue to half of the back of the paper (across the wide edge). Then, “book” your wallpaper by folding the edge of it in towards the middle. Make sure you do not crease it!
Make sure your edges are lined up correctly along the long side of the paper. Do the same for the other half. Booking your wallpaper will keep your adhesive from drying out before you’re able to hang it on the wall. And it’ll keep your paper from bubbling up, too.
Let your adhesive cure (not dry!) for 3-5 minutes.
Applying the wallpaper
Before you apply your wallpaper, use your pencil and level to mark where each strip of wallpaper will go.
Then, line up the edge of the wallpaper along that pencil line you just made.
Smooth the paper onto the wall with just your hands by moving them in a sideways and downward motion.
As you continue around the room, try to line up the seams and patterns as best you can. Paper strips that are hung nicely along the edges will give the smallest and most unnoticeable seam.
When you’ve lined up two strips of paper on the wall, go over that seam with your plastic smoother. After you let the glue dry, use a paper roller over the seam in short strokes.
Handling corners
Okay, when you get to the corners, you might think it’s fine to cover the corner and continue along the next wall like nothing just happened.
But wallpaper in corners doesn’t really adhere correctly, and you’ll end up with wallpaper that’s coming away from the wall.
The best way to put up wallpaper in the corners of a room is to allow one strip of wallpaper to overlap right on top of the other strip of wallpaper by just a hair. It’ll cause a ridge, so definitely only do this in tight spaces.
Wallpapering around doors and windows
If you’ve got to manoeuvre around windows and doors, no worries!
Apply the wallpaper to the wall with the edge of it overlapping the window or door frame. Then, cut the excess with your utility knife and smooth it out. Voila!
Repeat that process for all sides of the frame.
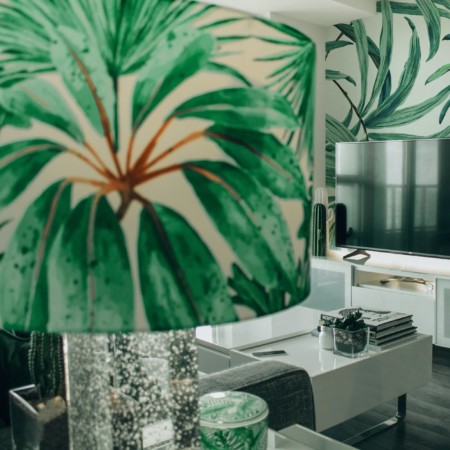
How to choose the right patterns
If you’re trying to decide on the right pattern of wallpaper, here’s a few tips for you.
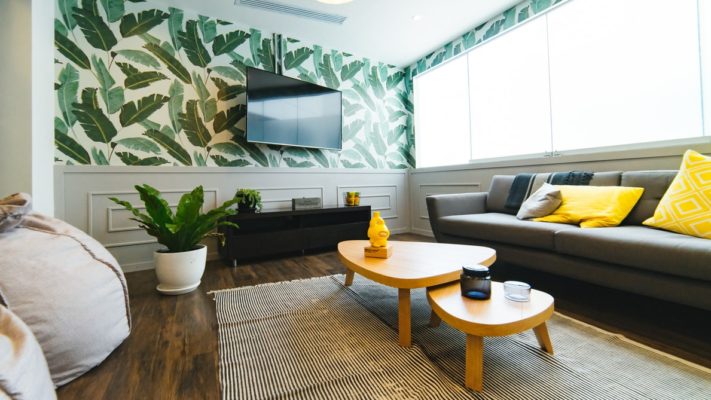
If it’s your first time wallpapering, steer clear of “drop repeat” patterns. Those are the large patterns and pictures that are placed sporadically throughout the paper. They are incredibly difficult to line up correctly, and if you make any mistakes, it’ll be glaringly obvious.
Stripes are the easiest to match up, but they can get a little funky in between windows since a break in the pattern disrupts the rhythm.
Smaller, denser patterns are great to use if you’re not set on stripes. The eye tends to overlook these kinds of patterns, so any flaws from hanging the wallpaper won’t be as noticeable.
Troubleshooting
If you’re not a seasoned pro (yet!) at hanging wallpaper, you’re likely to run into some issues. But not to worry — we’ll walk you through the most common problems of putting up wallpaper.
- First, when wallpaper is unrolled, it’ll automatically want to re-roll itself right back up. And that’s gonna make it hard to apply glue and hang it (obviously). When you’ve unrolled it, try rolling it in the opposite direction to keep it from curling.
- If you’re getting bubbles popping up where the wallpaper didn’t adhere to the wall correctly, wait until all of the glue dries. Then, use a glue syringe to pop the bubble. Inject a bit of glue there, and smooth the wallpaper back out.
- Be sure you keep in mind the colour of the wall you’re covering up. If you have a dark wall that you’re covering with a light coloured wallpaper, the wall paint might show through the paper. And it’ll definitely illuminate any mistakes or imperfections from hanging up your wallpaper.
How to hang wallpaper on the ceiling
Hanging wallpaper on the ceiling is pretty much the same as hanging it on your wall. But, in case you scrolled down to specifically this section (caught!), we’ll touch on the steps again.
Just like with your walls, prep the ceiling. Make sure it’s clean, and apply your primer.
Determine the vertical start point for where you will apply your wallpaper. Measure your ceiling from one end to the other. That’ll determine the length of the wallpaper you need. Add an extra few centimeters to allow for pattern matching between seams.
Get a ladder or scaffolding and begin applying the wallpaper along the vertical start point.
As you’re hanging the paper, if you notice bubbles showing from glue, use a damp sponge to push the bubbles out and smooth out the wallpaper. The sponge will also help you clean up excess glue as you go.
Continue the process with the next strip of wallpaper. Line up your patterns as best you can and repeat the process over again.
If you’re ready to spruce up any living space, consider doing it with wallpaper. You’ll definitely need to bring some patience if it’s your first time doing it. But don’t worry about it being hard to do – it just takes time!
And if you’re ready to buy the paper for your room (psst – did you measure your walls yet?) you can browse our wallpaper range to find the perfect pattern for your home!